Sunday, November 25, 2012

A little backlit fern photography

It's been horrible weather the last few days.  Rain, gale force winds - not the sort of environment for field photography even on the few occasions when the sun has broken through.  And, of course, I was looking for subjects to test out the cheap Opteka SB-15 flash diffuser I'd just purchased to give me softer lighting for macro and semi macro plant and insect photography.  Even in South West England there aren't too many plants in flower or insects on the wing in mid November - and especially not when the gales are blowing a hooley straight off the Atlantic.

In a few brief respites from the prevailing awfulness I wondered around the garden with my Canon 600D/Tamron 90mm/430EX/Kirk flash bracket/Opteka diffuser combination and even managed to get a few shots in before the heavens re-opened.  The lighting is definitely softer than with the Stofen Omnibounce diffuser that I've used previously, hardly surprising as the effective light source is considerably larger.  On the other hand the flash recycle time is longer, even when the light source is close to the subject on the bracket.  There is always a trade off.

One of the shots interested me and gave me an idea.  I grow a large tree fern, Dicksonia antarctica, in the rear garden.  It's currently sporing, with sporangia - the little capsules the cover the ripening spores in ferns - dotting the frond edges on the older fronds.  Here's the shot:

Dicksonia antarctica sporangia - Tamron 90mm macro, 600D, 430EX diffused flash on bracket
It's not too bad for a hand held shot but it lacks that little sparkle.  The lighting, though soft, is a little flat.  Fern fronds are thin enough to be translucent with strong backlighting but that means balancing ambient light with fill flash.  I'm never going to achieve that given the blustery conditions. 

So I gather fronds from some of the evergreen ferns I grow and move indoors.

And light breaks through yonder window.  Low angled, mid November sunlight.  Which can be used as backlight if I set up a quick studio on a suitable support.  It's very simple.  The fern frond is held vertically using an improvised clamp in a position where the sun will shine through the frond.  I angle it in such a way that I will have a dark background when I get the front of the lens parallel to the subject.  I mount my recently acquired (cheaply) Sigma 180mm HSM macro on the 600D and position the bracket mounted flash and softbox at the end of the lens.  Mirror lock up and remote release was used to produce the best sharpness on shots taken at around 0.5sec.  A couple of test shots suggests values of -1/3 exposure compensation for both metering and flash exposure using AV metering, the fill flash illuminating the front of the fronds and the sunlight providing the backlit translucency.  The difference from direct frontal flash is obvious.  Compare these two shots of the hardy maidenhair fern, Adiantum venustum:

Adiantum venustum - direct frontal flash
Adiantum venustum - backlit with fill flash
The second, with the thin halo of light around the fronds and illumination of the body of the fern and sporangias, to my eyes, far more interesting.

A few shots later and I have some backlit examples to show the different sporangia arrangements on four more of my ferns (I grow about a dozen but some have already retreated below ground and others had no suitable material for photography).

Athyrium onopordon 'Okanum'

Dryopteris erythrosora

Polystichum polyblepharum

Polypodium vulgare 'Cornubiense'
Each one is different in shape, number and arrangement of the spore cases and spores.  Indeed they are a feature used for fern identification.  And they do make good subjects for indoor shooting in wild and windy November.

There is one problem.  Fronds are not flat.  Even at f11 the depth of field is insufficient to have everything in focus.  So I tried focus stacking using Combine ZM software.  I'm still getting to grips with this and really need a focusing rail to produce the sequence of differently focused shots needed for the software to combine into a single image with far greater apparent depth of field.  I'm probably not taking enough shots for a really successful merge as I still get edge artifacts in the finished product.  Noticable at 100%, less so in a shot resized for the web.  Even so the results can be very interesting.  Adiantum venustum again, 5 shots stacked.

Adiantum venustum, 5 shots stacked using Combine ZM software
Definitely a technique to work on.  But well worth working on - the results can be spectacular.


Saturday, November 10, 2012

There's a spider in the bath...

...yells Maria.  She's right.  It's a big one, firmly stuck in the bottom of the bath.  Tagenaria gigantea.  It's 11:00 PM and it's my job to deal with it.  Which means I've got to get all the equipment ready.  600D, Sigma 180mm macro lens, tripod, remote release, diffused 430EX flash on a bracket to get the light close to the subject.

What?  You thought I meant a glass and card to trap and humanely remove it?  I'm an insect photographer.  I'll do that after I've got the shot.

So, late at night I'm banging about in the bathroom, manipulating the equipment described above in an attempt to get a good shot.  It wasn't easy, and I'm still not entirely happy with the results.  Even though my tripod - a Velbon CF530 - allows me to open the legs out almost flat I can't seem to get them into a position to support the weight of camera and lens and get close enough to the spider.  Eventually I end up with one leg in the bath, two flat on the bath surround and the lens pointing almost vertically downward.

Tagenaria gigantea
With a bit of manoeuvring I got a little closer.  Easy to see the enlarged palps at the front of the body that mark this one out as a male.

Tagenaria gigantea - a closer view
It was only when I uploaded the shots that I realised he'd lost a leg.  I wonder if that was from the last time I evicted him?  They are fairly territorial, after all.

Like it or not, spiders will creep into our houses.  I was doing some decorating yesterday, preparing a room for a badly needed repaint.  I moved a piece of furniture to unveil a couple of previously hidden false widow spiders, Steatoda grossa.  One vanished with speed, one seemed content to stay around.  Who could resist an opportunity like that?  Out came the 600D, this time with Tamron 90mm and 25mm extension tube and decorating ceased for a while.

Steatoda grossa
She - this one is female - didn't seem too concerned by the cracked and peeling paint.  But I was.  I needed to get on with the decorating.  I put down the camera after a dozen shots and gently evicted her.  She'll probably be back.  There are always dark corners to hide in, even in the cleanest house. The house spiders will always be with us.


Monday, October 29, 2012

Canon 55-250mm - the poor man's butterfly lens?

When the canon EF-S 55-250mm f4-5.6 IS was released in 2007 and began attracting good reviews for the image quality I started to become quite interested.  With IS and a close focusing distance of 1.1 metres, giving an effective magnification of 0.31 at the 250mm end of the range, it was looking like a good budget option for photographing the larger, more nervous insects such as butterflies and dragonflies.  It also looked like a reasonable option for closer photography of plants at the back of borders, a necessity for situations where I couldn't get close enough in gardens other than my own.  It would also be useful, I thought, for plant portrait photography in situations where I needed cleaner backgrounds than I could get with my 50mm macro.  At the time I couldn't afford it's EF big brother, the 70-300mm f4-5.6 IS, let alone anything better, so I started saving my pennies and a little while later, once the price had dropped a bit, I bought one to replace an antiquated 80-200mm f4-5.6, my longest telephoto zoom.

It's tempting to say I was disappointed but that's not quite true.  It's a budget lens, after all.  I was comfortable with the less than stellar but still quite tough build quality - I don't abuse my lenses so I don't need tank like build.  It focused accurately, the IS worked well enough to steady shots - though not to 4 stops improvement claimed, more like 2-3 stops - and the image quality is good as long as the lens is being used within its optimum parameters.  Unfortunately, once outside those parameters image quality falls off a cliff.  Go much over 220mm and softness creeps in.  Close up quality also suffers from softness.  And at close distances the IS becomes far less effective.  All of these synergise to seriously degrade image quality at the extremes.  Consider these shots of Rhagium bifasciatum, a long horned beetle who obligingly wandered across my path when I was doing the initial testing of my newly purchased lens. (Click to embiggen.)
Rhagium bifasciatum.  55-250mm at closest focus.  ISO 400, 250mm, f11, 1/160, flash.  Full frame shot.
Rhagium bifasciatum.  55-250mm at closest focus.  ISO 400, 250mm, f11, 1/160, flash.  Centre 100% crop.
Rhagium bifasciatum.  55-250mm at closest focus.  ISO 400, 250mm, f11, 1/160, flash.  Full frame shot
Rhagium bifasciatum.  55-250mm at closest focus.  ISO 400, 250mm, f11, 1/160, flash.  Centre 100% crop.
Even allowing for deficiencies in my flash technique (on hotshoe, no diffusion) and the use of 400ISO with its greater noise the softness is obvious, particularly when contrasted with the far greater sharpness of the same subject taken at the same time with the EF 50mm f2.5 compact macro.

Rhagium bifasciatum.  50mm macro at closest focus.  ISO 400, 50mm, f11, 1/160, flash.  Full frame shot

Rhagium bifasciatum.  50mm macro at closest focus.  ISO 400, 50mm, f11, 1/160, flash.  100% crop
The difference is fairly obvious.  That doesn't mean that the lens is useless.  It does mean that if you push it to the limits that performance falls off.  As always, you get what you pay for.   With some experimenting I did manage to generate a few reasonable results.  I liked the nicely blurred backgrounds, image stabilisation and excellent working distance - but I didn't like the softness inherent in using the lens at the extremes.
Speckled Wood butterfly.  55-250mm at 250mm.  Full frame.

Comma butterfly.  55-250mm at 250mm.  Full frame
Coenagrion puella, blue damselfly.  55-250mm at 250mm.  Full frame.
The other problem was that even with a 0.31 maximum magnification I couldn't really get close enough to fill the frame with the subject.  And my EF 25mm extension tube that allowed me to go 1:1 on the 50mm compact macro didn't fit the EF-S lens.  Yes, I could get EF-S fit extension tubes but only at the cost of further reducing light on what was already a slow aperture lens.  Time for some lateral thinking.

Canon make a close up filter, the 500D.  It's a double lensed additional optic that screws onto the lens filter threads and reduces the minimum focusing distance (measured from the lens front) to 500mm / 20in when the focal length is set to infinity.  On a zoom lens like the 55-250mm it gives a range of magnifications, from about 0.1 at 55mm, infinity focus to about 0.85 at 250mm, minimum focus.  In the latter case the working distance is reduced to about 12in.  Restricting the lens to 200-220mm and avoiding racking out the focus to the closest limit to improve the image quality takes this down a little but still produces good magnification from 0.1 up to about 0.7x life size, well within that needed for a good range of butterfly or dragonfly shots.  And all at a working distance that is far less likely to scare off flighty insects.

In June 2010 I bought one. So, how does the combination stack up?

Surprisingly well is the answer.  All full frame shots.

Common blue butterfly.  55-250mm/500D combination

Cortuledgaster boltonii.  55-250mm/500D combination

Crane fly.  55-250mm/500D combination
Large red damselfly.  55-250mm/500D combination
Marsh thistle.  55-250mm/500D combination
It's not quite as good as a dedicated macro lens.  Shortly after buying the 500D close up filter I had the opportunity to pick up a Tamron 90mm macro lens at a reasonable price and the difference in the capture of small detail is noticeable.  But where the combination scores is in the ability to use the best optical ranges of the telephoto and still get reasonable magnification at a good working distance.  For natural light photography the IS is very useful to steady the shot.  Autofocus still works though I prefer to set to manual focus, usually slightly less than infinity, and adjust magnification with the zoom ring while moving slowly closer to the subject to capture the shot as it comes into focus in the viewfinder.  Because the working distance is always the same it soon becomes second nature to use the technique.  Above all, the combination is light and easy to handle, whether unaided or with my flash and bracket combination.  And in the field that's a valuable feature.

So, is the Canon 55-250IS the answer to a poor man's prayers for a good butterfly lens?  On its own, no. Combined with the Canon 500D close up filter it comes very close by meeting the requirements for the needed combination of working distance, adequate magnification and good image quality at a reasonable price.  It's certainly cheaper by far than any of the 180mm macro lenses on the market, or that other favourite of the dedicated, the Canon 300mm f4 L IS with extension tubes.  Even though I've now acquired a Sigma 180mm f3.5 macro (cheaply, the pre DG model) I suspect I'll still be using this combination for field work in years to come.


Tuesday, October 16, 2012

The hoverflies of summer

The marmalade hoverfly, Episyrphus balteatus, on Meconopsis cambrica in the garden

I freely admit that I'm no insect expert but my training as a zoologist / ecologist does allow me to use taxonomic keys to roughly identify most of the larger insects down to family or even genus level.  After that I'm reliant on the quality of my photographs to pick out identifying features which can help in the trawl through Google images and other resources to identify particular species.  So it is with hoverflies.

Beyond a vague knowledge that there are quite a few different species in the UK (about 250), that many mimic wasps and bees in their protective coloration, and they act as efficient - if indiscriminate - pollinators I'd never really looked at them in any detail.  By 2010, however, I'd put together the macro flash rig I illustrated in the previous post and was looking for subjects.  And hoverflies suddenly swam into focus.

I don't specifically garden for pollen feeding insects but I do grow a lot of plants that provide abundant sources throughout the warmer months.  Which means the garden is a good source of subjects.  I also live close to one of Plymouth's suburban nature reserves and walks through there are usually productive.  So it was that I started to put together quite a few photos.  And then the ID problems started.

Some were easy.  Episyrphus balteatus, the marmalade hoverfly, is pretty distinctive in its orange and black markings.  Equally easy to ID was the long snouted Rhingia campestris.  You can't really mistake it for anything else -  even though I only saw it once and only managed a single shot earlier this year and I often need a few for ID purposes.

Episyrphus balteatus

Rhingia campestris in the local nature reserve
Also distinctive is the yellow and black vertical banding on the thorax of Helophilus pendulus.  I should probably be worried about finding this in the garden.  The larvae live in muddy ponds and ditches - which suggests its time to finally do some cleaning in my little garden pond.  A messy job that I've been putting off.

Helophilus pendulus in the garden
Some of the other wasp mimic hoverflies are harder to tell apart for the amateur insect photographer.  Take the following two:

Meliscaeva cinctella

Syrphus ribesii
Taken moments apart on the same flower head, it was only when I got the shots uploaded after I returned home that I realised I'd captured two entirely different species.  I simply didn't (still don't) know hoverflies well enough to have an instinctive knowledge of them.  An important lesson comes out of that.  With unfamiliar wildlife and the marginal cost per shot of digital it makes sense to keep shooting even if you think you've already captured a good shot of your subject.  You may be capturing something completely different without realising it.

I'd like to think I was working to that philosophy when I took this capture of Myathropa florea feeding on my Sedum spectabile earlier this year.  It's not one of my better shots - but I could easily have ignored the hoverfly thinking it was one I'd already photographed.
Myathropa florea


Then there are the hoverflies that are relatively easy to identify to the genus level but after that it's a nightmare.  Sphaerophoria is a case in point.  Fifteen British species and the only one that can be identified with certainty from photographs is the long bodied male Sphaerophoria scripta.  The one below is female - you can tell from the wide separation of the compound eyes, males are narrowly separated - but apparently they can only be correctly identified from microscopic differences in the genitalia.  So, much as I would like to identify this one as Sphaerophoria fatarum - the markings match - I can't.

Sphaerophoria sp.  Possibly S.fatarum
At least these two Eristalis honey bee mimics are easier to identify.  At a distance the mimicry is effective - but close up it falls apart a little.

Eristalis pertinax
Eristalis tenax
 Apis mellifera, the honey bee the two Eristalis are mimicing
So far, I've only just lightly scratched the surface of hoverfly photography.  The challenges for next year will be to shoot (and hopefully identify!) more species and to start shooting more natural light shots with my newly acquired Sigma 180mm EX HSM f3.5 macro.  But at least I can now identify two of the three hoverflies I shot in early September this year, companionably feeding on the abundant pollen of Meconopsis cambrica.

Syrphus ribesii (t), Eristalis pertinax (r) and an unknown small species on Meconopsis cambrica


Tuesday, October 9, 2012

The slow evolution of a macro nature photographer


It's hard to say when I got into close up and macro nature photography.  My first 'real' camera was an Olympus OM10 (with manual adaptor!) and it didn't take me long to get a set of extension tubes to add to the 50mm and 135mm lenses I'd bought with the camera in the mid 80's.  But I was always limited by the cost of film and could only afford to use the occasional roll to go closer than I normally did for my main plant and garden subjects.

Olympus OM10, T20 flash, extension tubes on 50mm lens.  I keep it for sentimental reasons.  No reasonable offer refused.
68mm of extension on a standard Zuiko 50mm lens gives about 1.3:1 of magnification.  An insect or flower 25mm broad would occupy the full width of a 35mm frame.  True macro territory.  But limited by a very short working distance from the front of the lens to the subject and no bracket / off camera cord to bring the flash close to the front of the lens to provide enough light to freeze motion for more mobile subjects.

I'd shoot the occasional butterfly, dragonfly, or larger insect hand held, using the 20 or 36mm tube in the set and exploiting the extra working distance of a 135mm 'close focus' (3ft/0.93m!) lens.  The results weren't fantastic though just about good enough to use to illustrate the odd on line article when scanned on my old Olympus scanner.  Typically, I've only kept some low res images - but I still have the original slides and could re-scan if needed.

Our thanks to John Richmond for this image
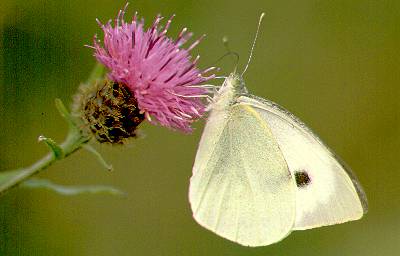
Large white, Pieris rapae, taken in the 1990s
Then came digital.  After a brief dalliance with a Minolta digicam I raided the piggy bank in December 2004 to buy a Canon 300D, the first affordable (sub £1000) DSLR.  It was about a year after it came out and prices had almost halved.  Once purchased, the incidental cost of shooting is virtually zero so I could finally experiment.

Rather than extension tubes I went for my first macro lens, the Canon 50mm f2.5.  It only goes to 0.5:1 (half life size) unaided but can manage 1:1 (life size) with a 25mm extension tube.  On the smaller sensor 300D I could shoot at about the same equivalent magnification as with the Olympus gear.  Bought used, I had a basic macro set up for less than £200.  Results were better than I hoped.  The long years of practice handholding and supported with a tripod had obviously had some effect and I was producing shots that I was pleased with.

Shots like these from 2005:

Phygelius 'Salmon Leap'.  1/100sec, f3.5

Libellula depressa.  1/250sec, f13
Tricyrtis hirta, single flower detail.  1/60sec, f9

I was happy for a couple of years.  I could capture lots of detail and, more importantly, could keep shooting until I was satisfied that I'd got the shot, something I could never afford to do with film.  But it still wasn't quite enough.  I needed more working distance for the more active insects and to use longer focal lengths to narrow the field of view and produce smoother backgrounds.  I needed off camera flash for smaller insects. 

In 2008 I bought a used 400D and 430EX flash.  Adding the 25mm extension tube to my previously acquired Canon 28-135mm f3.5-5.6 IS and 80-200mm f4-5.6 II (an underrated lens for a rock bottom cheapo) gave me extra working distance and softer backgrounds but the image quality wasn't up to 50mm macro standards.  For all that I got a few decent shots, either tripod mounted or using the flash with a diffuser on the hot shoe.

Early purple orchid, Orchis mascula.  Canon 28-135mm IS, natural light

Brimstone butterfly, Gonepteryx rhamni 80--200mm, flash
Time moved on and by 2010 I'd invested in a Tamron 90mm f2.8 macro lens together with a Kirk macro flash bracket and off camera cord for the 430EX flash.  It all looks a bit ungainly - but the results I'm starting to get after three summer's use are becoming increasingly satisfying.  And tripod mounted, the Tamron is great for natural light plant photography.

400D, Tamron 90mm, Kirk bracket and 430EX - my relatively low budget macro flash kit
Empis livida - a robber fly, taken in 2010 with this kit
Lasioglossum calceatum.  2012.  I added a 25mm extension tube for this one.
An unidentified (as yet) small hoverfly.  2012
Of course, I still like natural light - maybe with a bit of fill flash - but that brings its own problems.  One budget solution I've tried is the cheap (ish), close focusing 55-250mm f4-5.6 lens combined with a Canon 500D close up filter.  By focusing with the zoom ring it runs from about 0.2:1 to 0.8:1, all with a 20in / 50cm working distance.  When it works well its surprisingly good - as I'll look at in another post and as illustrated by the shot below.

Utetheisa pulchella, the Crimson Speckled Flunkey, a day flying moth I photographed in Cyprus with the 55-250 / 500D close up filter combination.
That has all the requirements of soft light and the clean background that comes from the narrow angle of view inherent in a longer telephoto lens.  What it doesn't have is the absolute clarity of a good macro lens / higher resolution sensor combination. Which is why, thanks to a small legacy, I've just upgraded my camera to a Canon 600D and added a used Sigma 180mm f3.5 macro (pre DG) to my lens kit.  Another learning curve to be tackled!


Welcome

Large skipper butterfly, Ochlodes faunus.  Canon 400D, Tamron 90mm macro.

For nearly two years I've posted illustrated gardening, garden wildlife and related articles at my other blog, John & Maria's Garden Pages, a continuation of a website I first started in 1997.  What there hasn't been room for on that site are postings that are about the photographic techniques, equipment and the processes used to produce the end results that have featured on my other blog and elsewhere on the net.  So the obvious thing to do was set up another blog to cover these areas.

Two things are important to understand my photography and how this blog will be oriented.  Firstly, I use Canon DSLR equipment.  Secondly, I'm a relatively poor photographer.  By that I mean I don't have a lot of money to spend.  Equipment costing over £500 ($700 / €600) is beyond my reach.  Anything much over £100 is a major purchase that requires careful consideration.  Which brings me back to the first point.  I use Canon DSLR based gear purely because my first digital SLR was the 300D, bought back in December 2004 to supplement - and then rapidly replace - my Olympus OM film cameras and lenses.  At the time it was the only affordable DSLR - and subsequent purchases have locked me into the Canon system.  Put simply, I don't have the money to change to or experiment with Nikon, Sony, Olympus, Pentax or other DSLR based systems.  I'm not complaining, just stating a fact.

Which means that what you'll get here is the musings of a budget limited, Canon DSLR equipment based, garden, plant, insect, macro, landscape and wildlife photographer.  I hope I'll provide material of interest.