Isolated on white
I don't have a permanent home studio. I do have a couple of softboxes that I can fire a pair of Godox T350 flashes through for static indoor shots. Dull, rainy days often encourage me to set up a table and backdrop and use the setup to shoot a few subjects isolated on a white background. Subjects such as:
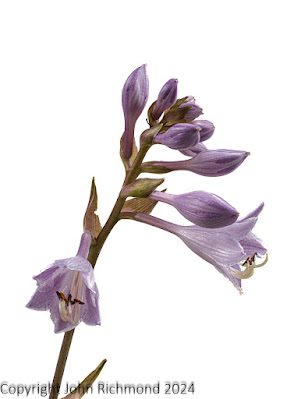 |
| Hosta 'June' |
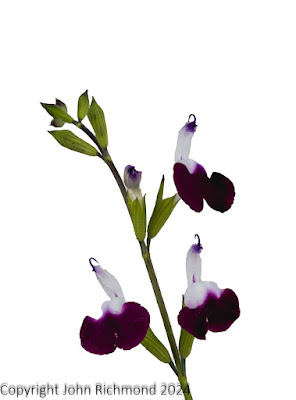 |
| Salvia 'Amethyst Lips' |
With an unsophisticated setup I don't have much control over my lighting. I can get a soft, diffused light on the subject with the twin softbox/flash combination but I can't control the background lighting in my limited space. Invariably it comes out grey, as shown with this unprocessed RAW image of Hippeastrum papilio.
In the past I'd have exported to Photoshop and, using layers and masking, isolated the subject and filled the background with a pure white fill layer. Even using the select tools, getting the edges sharply defined was always a fiddle, taking too long in too many cases.
Fortunately Lightroom now has far more sophisticated masking facilities that has made the job a lot easier (though it's made my ageing computer rather slower!). So, taking the above image, I firstly use one of my presets to enhance the overall colours. Then, using the Develop module masking tool I select the Subject mask.
By ticking the Show Overlay on I can see which parts of the subject have been masked and, if necessary, add or subtract from the mask. With the considerable differentiation between the subject and the background Lightroom's AI driven selection had no difficulty fully selecting the subject.
The subject area can then be manipulated for colour, contrast, tone curves, saturation, clarity etc without affecting the background. Once I'm happy with the subject I click on the Mask1 symbol in the Masks tool and select Duplicate and Invert mask. The background is now selected.
In this case there were a couple of spots where the overlay was missing. These were easily added using the brush tool from the Add button.
I can now manipulate the background without affecting the subject.
By setting the histogram clipping tool on I can see which parts of the background have been set to pure white by using the Exposure, highlights and white sliders.
Note the lack of red in the top right corner. Better to deal with that using another mask to avoid disturbing the balance between the subject and the background at the edges.
The end result is a plant portrait on white, easy for an end user to cut out and drop into a page layout:
Is it worth the effort? Yes. It took a lot longer to write this than it did to process the image and, as I've found, there is a very reasonable market for these sort of shots. I have a fair few on my Alamy portfolio and a good number have sold. The return on time investment is definitely worth while.


No comments:
Post a Comment